
 API References
 API change log
Overview of Custom Tables
This guide covers
- The basics of Custom Tables
- The difference between Custom Fields and Custom Tables
- How to incorporate Custom Tables into your plug-ins
Guide Article
This guide will walk you through on:
- What are Custom Tables
- What Custom Tables can be used for
At the end of this guide, you will be able to understand, create, and allocate specific information to your Custom Tables.
To understand more about our Custom Table APIs, please click on our Custom Table API page in the guide materials.
Let’s begin:
What are Custom Tables?
Custom Tables are similar to Custom Fields where it allows the Developer to store information onto Arcadier’s databases and be able to retrieve it in future calls.
The main difference between Custom Tables and Custom Fields is how it is declared and how the memory is accessed. In addition, Custom Tables are pre-determined by the Developer and information inputted will be stored onto the table itself, whereas Custom Fields on the other hand allows you to store information into a single memory location regardless of the type of data desired.
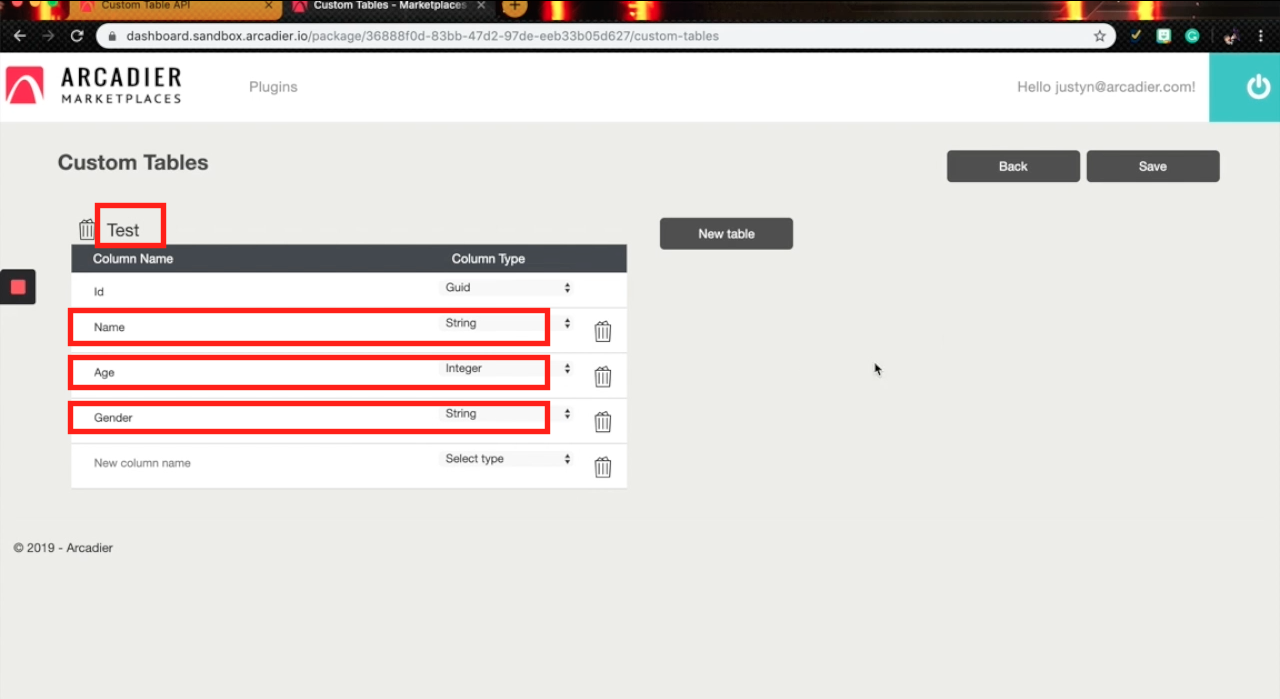
Here is an example using an Excel spreadsheet:

- Create a Custom Table called “Test”
- Allocate three columns called Name, Age, and Gender
- Everytime you call the API to create a new row, you will need to input data. Once you send in the request, it will respond with an ID
- This ID is the ID of the entire row. You can use this ID to further update information or to delete the entire row
Important Note:
- The API will still work even if any information inside any of these columns is null.
- Custom Tables can only be defined by the Developer
How to create and implement Custom Tables?
To create Custom Tables
- Go to your Developer’s dashboard of your developer’s account and navigate to your specific plug-in

- Edit the Custom Tables within the package. Initialize a name and variables to go along with the input types
- After that is done, Save the changes. Do take note of the PluginID as it is required for the API call
- Open up Postman with your PluginID, the downloaded Custom Table API is now ready to be called

- In your Marketplace, create a variable called PackageID and copy and paste your PluginID inside the entry field

- Open the Create New Row Entry API and input your Custom Table’s name into the variable that says “custom table name”
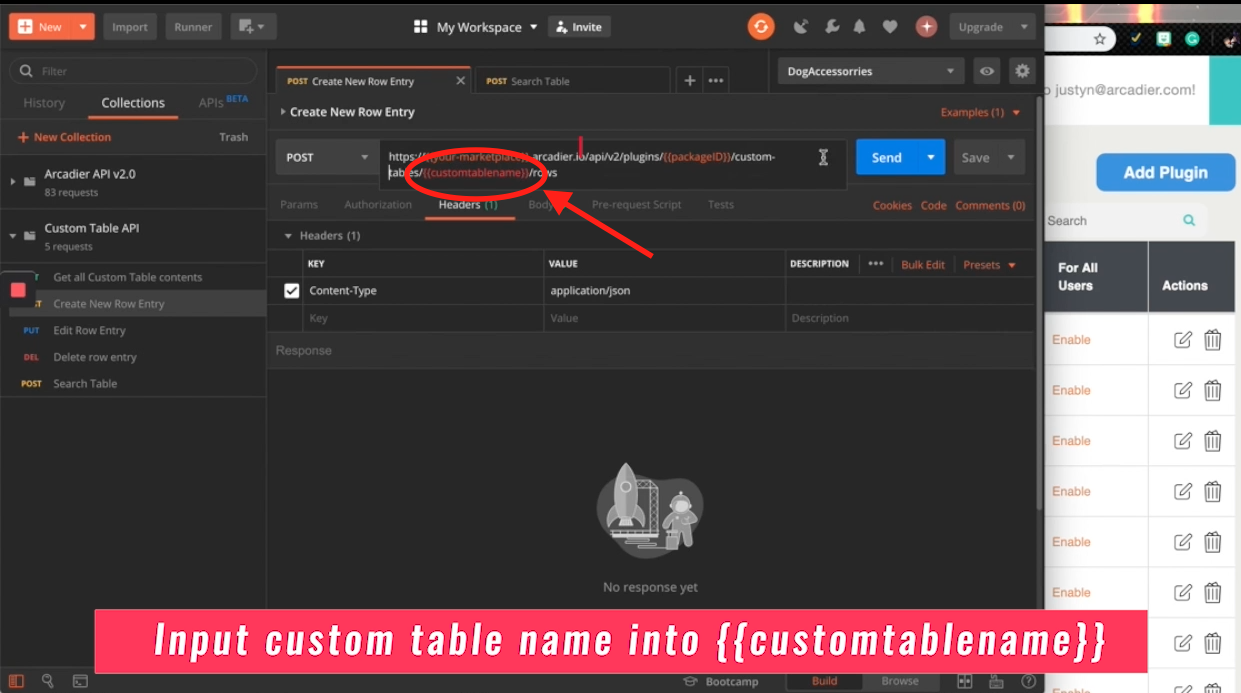
- Head over to the body tab of the API call and allocate the desired test variables. From there, Send in the API request
- As shown in the image below, the API responds with the information within the row as well as the row ID - This row ID is what you will use to edit or delete a row


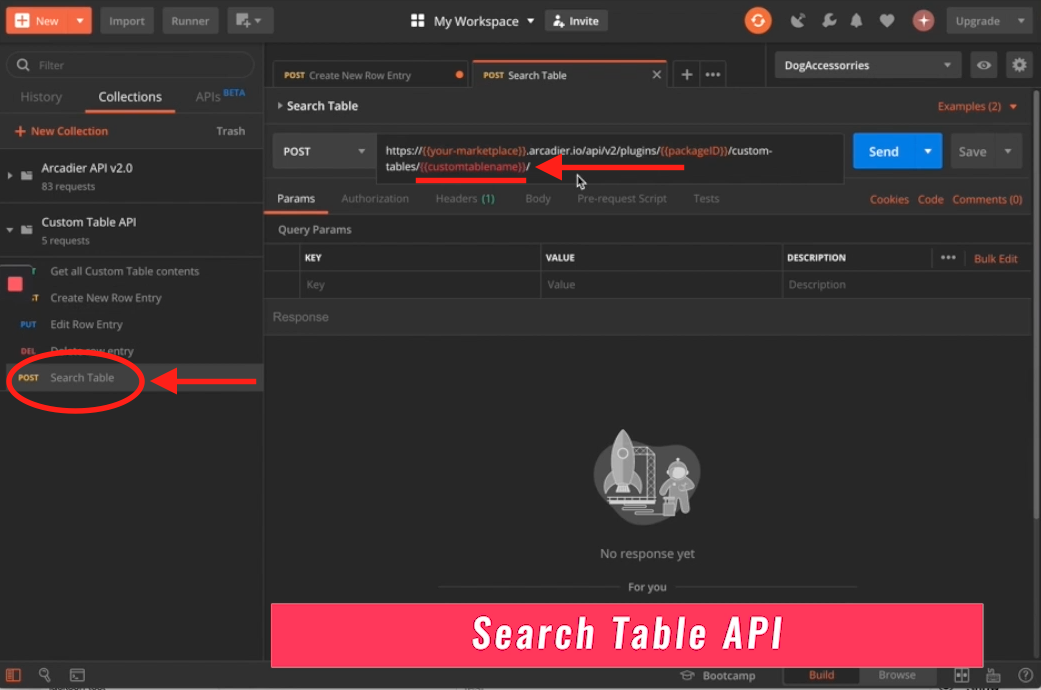
- Double check on whether the action was done correctly by going to the “Search Table” API call to see if the Custom row you created is there
Result
As you can see, the implementations for this is significantly different from the custom fields. You will be able to choose which API call to implement for your plug-in based on the specific design of your feature.
Thank you for going through Arcadier’s development guides. We hope that these guides have helped prepare you to become a developer for Arcadier’s various marketplaces.