
 API References
 API change log
Altering the User Interface through the use of Plug-Ins
This guide covers
- How do you upload a plug-in to alter the User Interface?
- What is the difference between the Admin interface and User interface?
- How do you specify User side variables?
By downloading this file, you agree that its use is subject to the applicable Terms of Service and You can only use and modify the content in these exercise files with the following agreements: That these files are for Your own personal use for education purposes and to practice the skills to develop on Arcadier. That by using or altering these samples codes, You understand that Arcadier is not responsible for any effects these codes may have on your application, software or environment, both positive or otherwise.
Guide Article
This guide article will walk you through the internal structure of your plug-in’s folder and will show you how to alter your User interface through the plug-in you create. By the end of this guide, you will know the difference between an Admin interface and User interfaces, specify User side variables and will be able to alter what Users see on their webpage based on their specific roles on your Marketplace.
Let's begin:
- Inside the root folder, there will be an Admin and User folder. For this particular guide, we will focus solely on the User folder
- Both your Admin and User folders each contain three subfolders called css, html, and scripts
- All of these codes will be placed under the default User folder


Important Note
In terms of understanding code, specifically html, the html folder in your User folder should be left empty because it is not necessary for this plug-in. The reason being is that you are not trying to render a completely new page for the user but instead, you are adding or removing a specific element from the page through javascript.
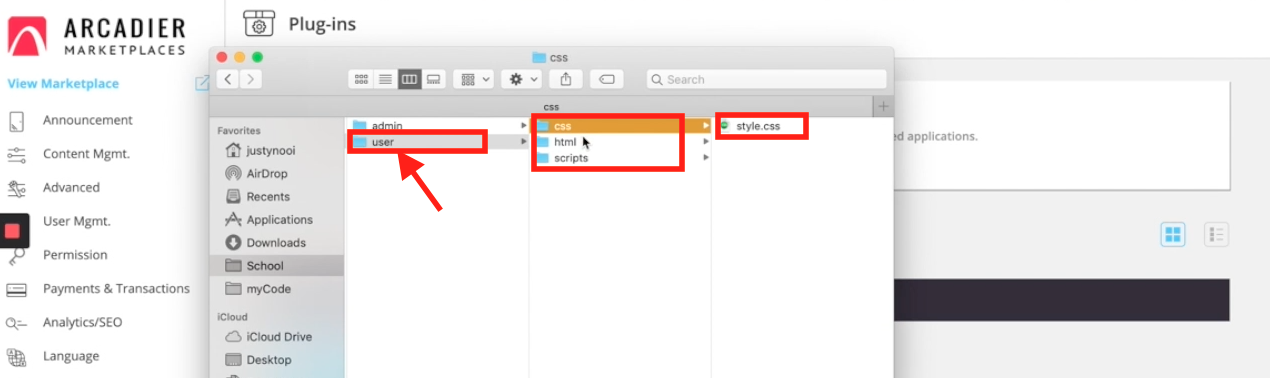
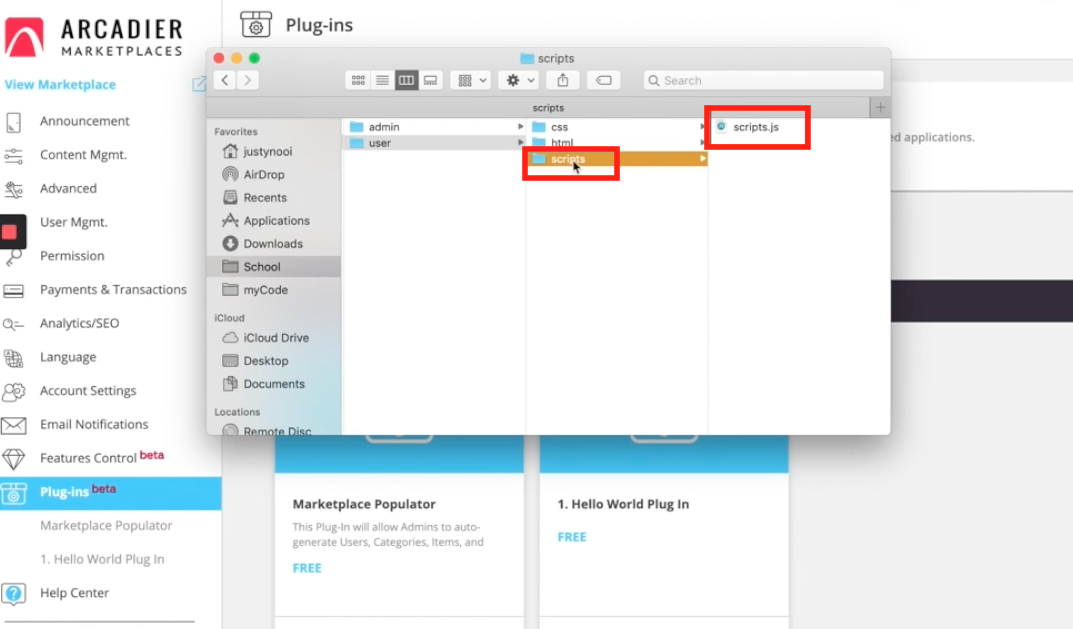
The css folder will contain the style.css file while your scripts folder will contain the scripts.jss file. The style.css code is the style of the elements to be created or altered. In javascript, this code will find a section in your Marketplace’s homepage and then insert a button there. Take note that the code is slightly more complex, so you will need to specify certain parameters at several places within the code.
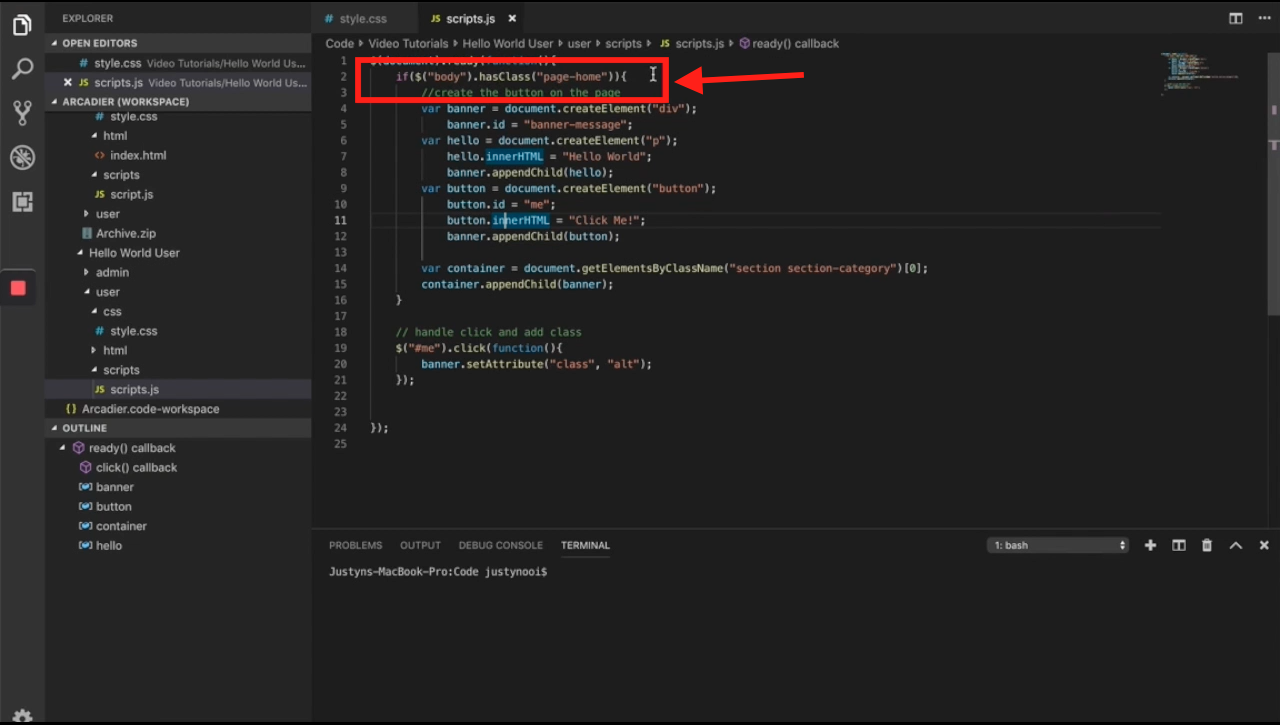
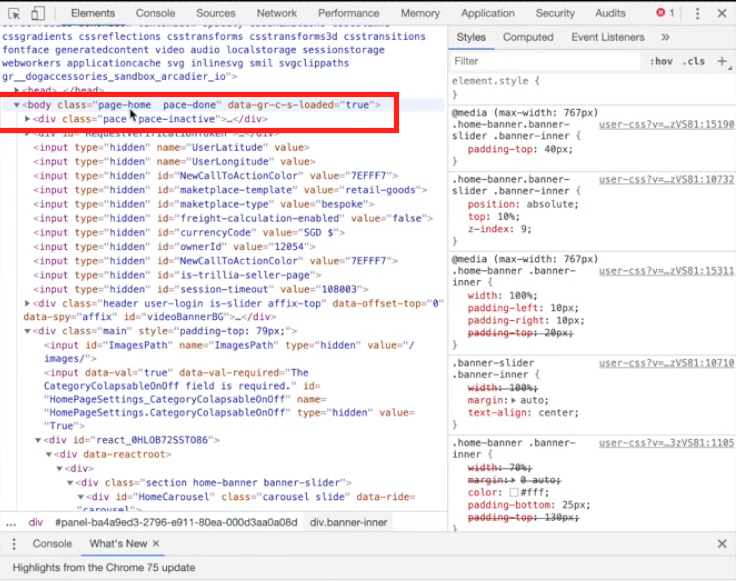
In the image below, the highlighted line of code determines which page in your Marketplace will contain the button:
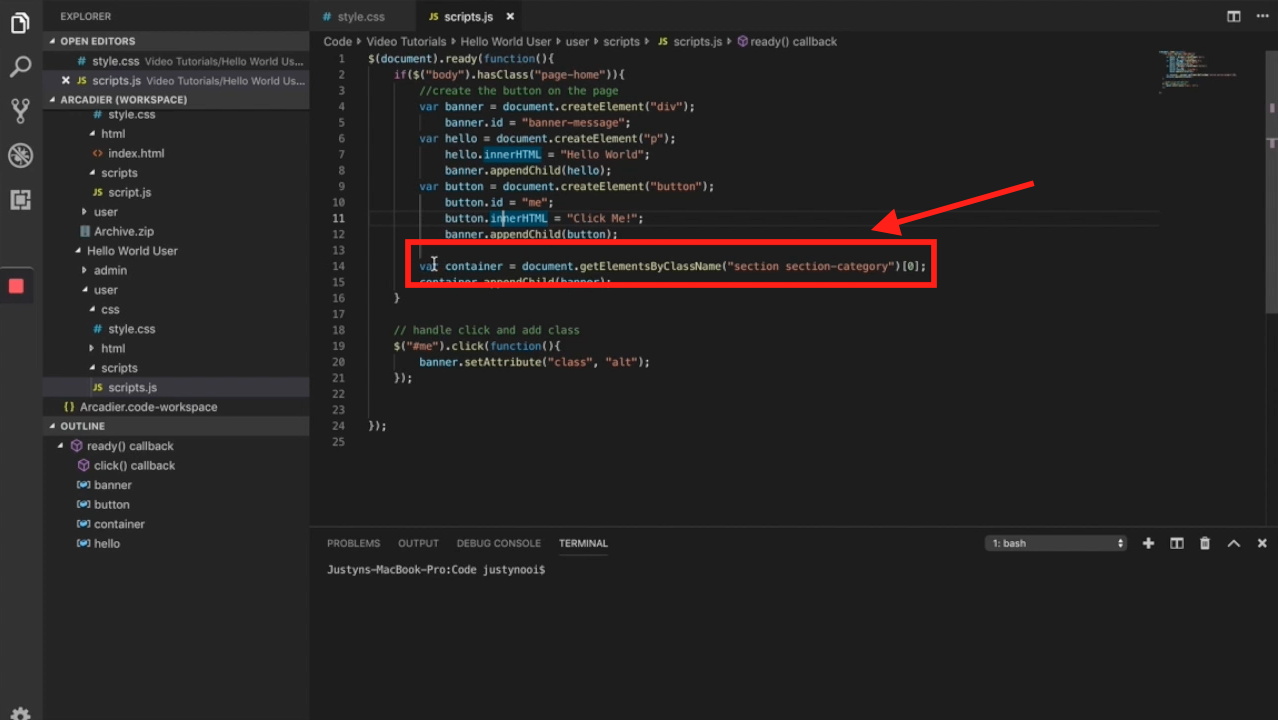
In the image below, the highlighted line of code will locate a specific section in your Marketplace’s homepage for you to alter the button’s placement:
In order for you to get these two variables to work, right-click anywhere on your Marketplace’s homepage followed by selecting Inspect to view the rendered html page. From there, you will view the various divisions. The homepage example has a class of page-home - the body of code declared to locate that specific class
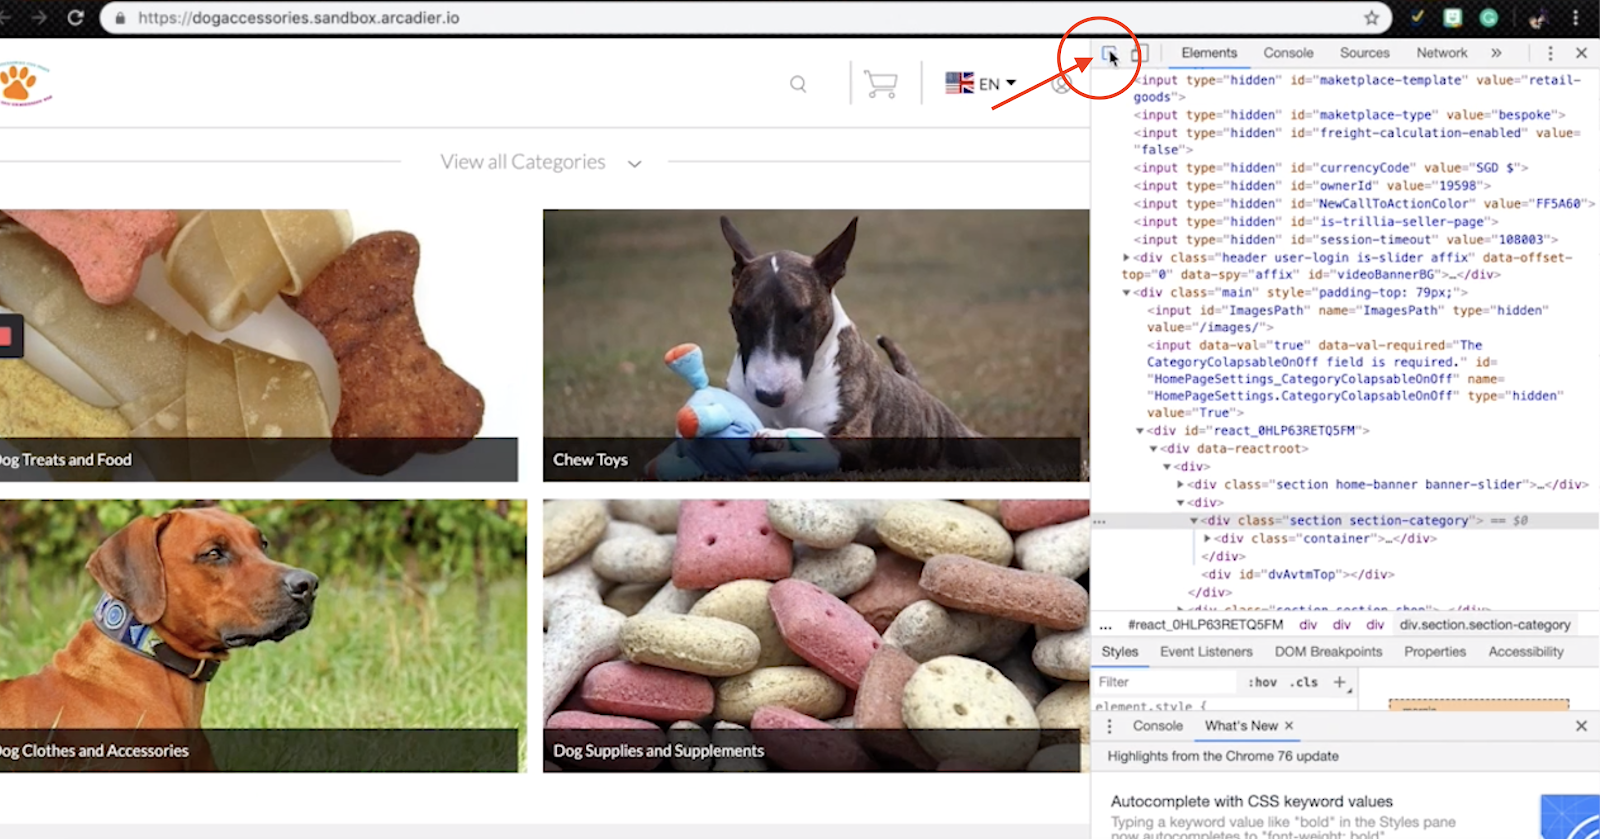
To place your button at a specific location, make sure the arrow function is enabled in order to correspond the relevant divisions to their elements
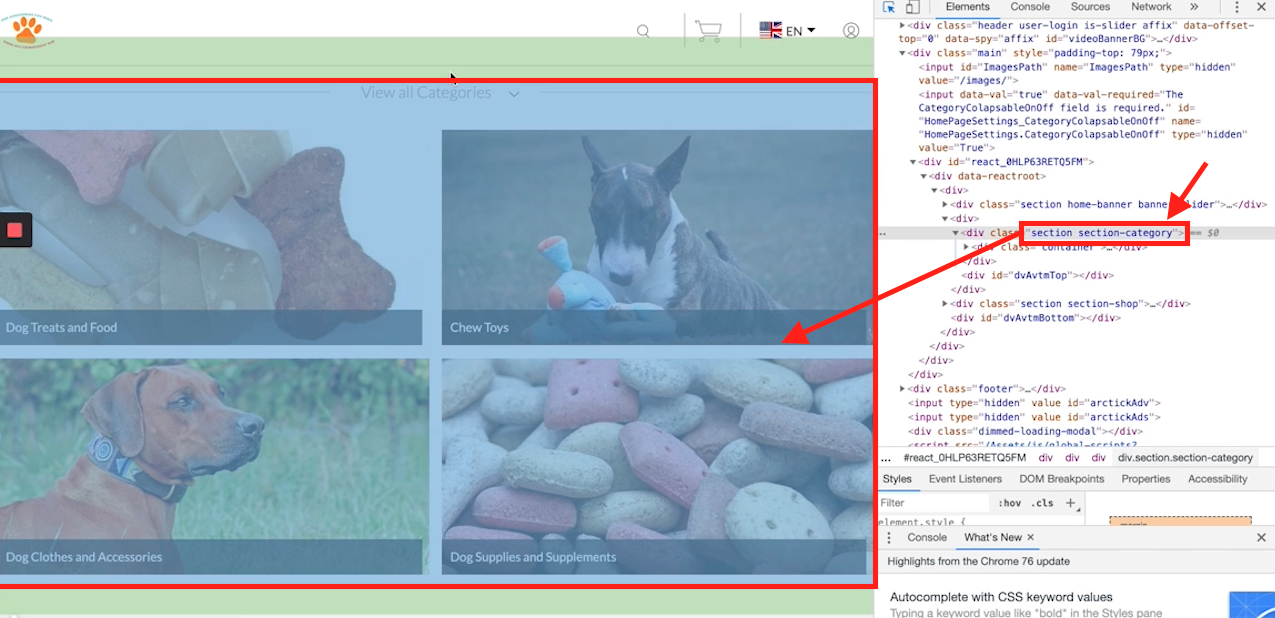
- In the example above, our specific location is the Categories division. When you hover over the Category tabs, it will show you the division having two classes - a section and a section-category
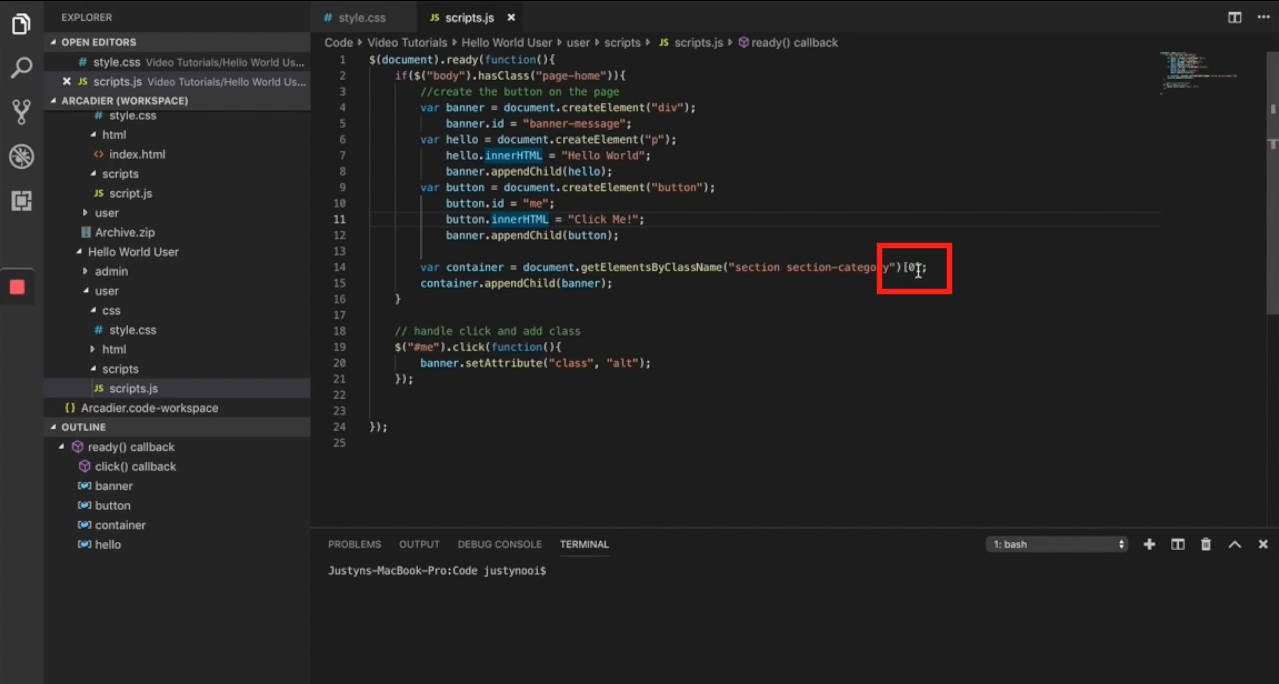
- This javascript script function is written in such a way that it is necessary to add an index at the end of the code. In addition, this javascript function returns an array so you will need to initialize the index
- Once you have understood and modified your code, upload your code onto your Developer’s Dashboard. Compress and .zip the Admin and User files together
- Check that all corresponding details are correct. Click on Save and Click on Enable to allow all Users to see the new changes
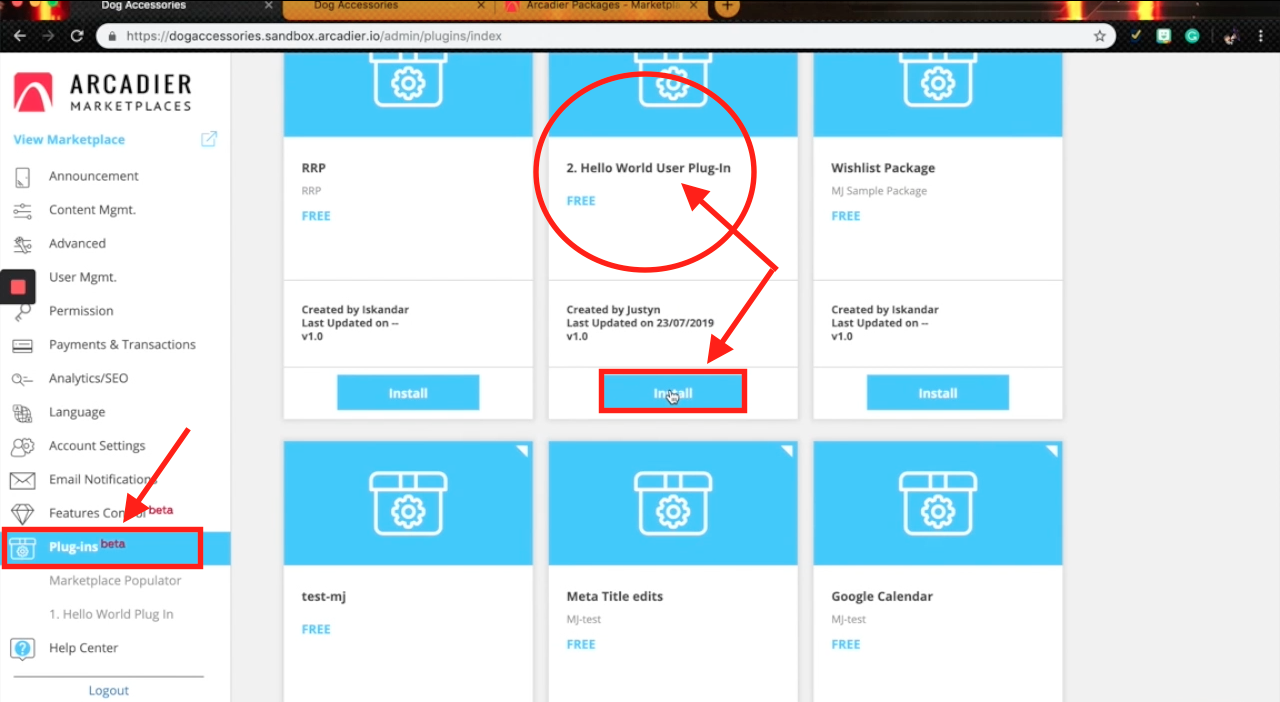
- To find and install your new plug-in, simply click the Plug-ins tab in your Admin dashboard, and your plug-in will be available under the “Available” tab
Important Note
Upon installing the plug-in, you will see an html error message, but do not worry. This is because the newly-installed plug-in is trying to fetch the html content from your empty Admin folder. To rectify and alter this page, create your own html file under the html folder inside your Admin folder.
Results
Once you have your new plug-in installed, go to your User Interface and click on the button you have created to test if the plug-in functions the way it should. If it is successful, you now know how to alter the User’s interface through the use of plug-ins.